Choose the right time of day for your shoot. Natural light works wonders, and capturing images during the golden hour–shortly after sunrise or before sunset–can add a warm glow to your property, making it appear more inviting. Avoid harsh midday sun, which can create unflattering shadows and overexposed areas.
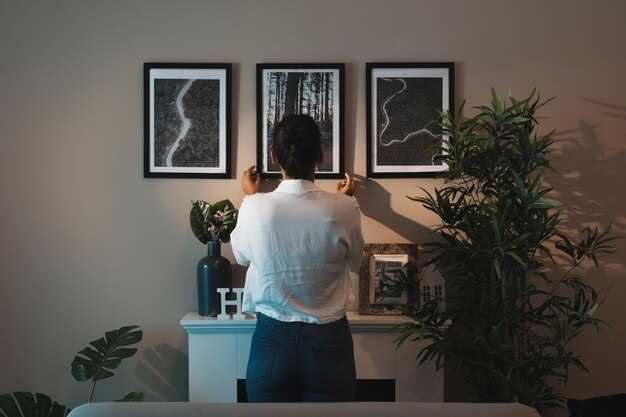
Ensure your property is clean and clutter-free. A tidy space allows potential buyers to envision themselves living there. Consider rearranging furniture to create a more open layout and adding fresh flowers or plants to add life and color to your images.
Focus on composition. Use a wide-angle lens to capture more of the space, but be cautious not to overdo it. Straight lines create a polished look, so keep your camera level when shooting. Highlight key features like fireplaces, kitchens, or unique architectural details that make your property stand out.
Edit your photos thoughtfully. Adjust brightness, contrast, and color balance to enhance the images without making them look unrealistic. Use editing software that allows you to make subtle corrections while maintaining a natural vibe, helping buyers connect emotionally with the property.
Finally, incorporate lifestyle shots. Showcase the surrounding area and amenities, such as parks, schools, or shops. These images can help potential buyers imagine not just the home itself, but the lifestyle that comes with it, making your property even more appealing.
Choosing the Right Time of Day for Optimal Lighting

Photograph your property during the golden hour, which occurs shortly after sunrise and just before sunset. This time provides soft, diffused light, reducing harsh shadows and bright spots.
For interiors, shoot when natural light flows in through windows. Mid-morning or late afternoon works well, as this prevents overly bright sun and harsh contrasts. Adjust your curtains to control the light and create a welcoming ambiance.
Overcast days also yield excellent results. The cloud cover acts like a natural diffuser, casting even light across your space. This helps showcase the colors and details without interference from glare.
Be mindful of the property’s orientation. South-facing homes benefit from consistent sunlight throughout the day, while north-facing properties may require strategic shooting times to capture the best light.
Experiment with different times and conditions. Take test shots to find the best lighting that highlights the features of your property, ensuring a captivating presentation for potential buyers or renters.
Essential Gear for Stunning Real Estate Photos

A high-quality camera is your first step toward capturing impressive real estate images. A DSLR or mirrorless camera offers flexibility with interchangeable lenses and superior image quality. Look for models with at least 20 megapixels for sharp details.
Lenses play a significant role in showcasing properties. A wide-angle lens, such as a 16-35mm, allows you to capture more of a room in one shot. This is especially useful for smaller spaces to create a sense of openness. A standard zoom lens (24-70mm) is also handy for versatility during shoots.
Tripods are indispensable for real estate photography. They provide stability, allowing for longer exposure times without camera shake. A tripod also helps maintain consistent framing across shots, particularly when shooting still interiors or exteriors in low light.
Lighting equipment can dramatically enhance your photos. Use external flashes or softboxes to illuminate dark areas and avoid harsh shadows. Natural light is ideal, so consider scheduling shoots during golden hours for softer, more flattering illumination.
Post-processing software is equally important. Adobe Lightroom and Photoshop are industry standards for editing. These tools enable you to enhance colors, correct perspective, and make other adjustments to ensure your images look polished and professional.
Finally, consider using a drone for aerial shots if you want to highlight the property’s surroundings or features. Drones offer a unique perspective that can create stunning visuals, especially for larger properties.
Staging Your Home: Tips for a Photogenic Space
Choose a neutral color palette for walls and furniture. This creates a calming atmosphere and allows potential buyers to envision their own style. Soft grays, whites, and beiges typically work well.
Declutter each room thoroughly. Remove personal items, excessive decor, and unnecessary furniture. Keep surfaces clean and clear to highlight the space’s features.
Arrange furniture to create flow and purpose in each room. Position sofas and chairs to encourage conversation, and ensure pathways are clear. Define areas such as reading nooks or dining spaces effectively.
- Use mirrors strategically to reflect light and make spaces feel larger.
- Add fresh flowers or potted plants for a touch of life and color.
- Incorporate soft lighting; mix natural light with warm-toned lamps to create a welcoming atmosphere.
Highlight key features of your home. If you have a fireplace, arrange furniture to showcase it. For a spacious kitchen, set the dining table elegantly to inspire family gatherings.
- Remove dated or excessive personal artwork, opting for a few quality pieces instead.
- In bedrooms, use inviting bedding with coordinating pillows to create a serene environment.
- Bathrooms should be spotless; add plush towels and subtle, fresh scents for appeal.
Consider seasonal staging. During fall, warm colors and cozy decor enhance comfort. In spring, fresh flowers and light fabrics create an airy feel. Tailor the staging to resonate with the current season.
Lastly, take a step back to view your home from the perspective of potential buyers. Walk through each room as if seeing it for the first time. Adjust any elements that don’t resonate or stand out positively.
Utilizing Natural Light to Enhance Property Features
Maximize natural light by shooting during the golden hours–shortly after sunrise and just before sunset. This soft, warm light adds a welcoming ambiance and highlights your property’s best attributes. Ensure you open all curtains and blinds to let in as much light as possible.
Lighting Angles and Strategies
Position yourself wisely to capture light spilling into rooms. Aim for angles that showcase how light enhances architectural features, such as moldings and open spaces. Test different perspectives; sometimes a slight shift can illuminate a hidden area or feature.
Minimize Harsh Shadows
Soft, diffuse light reduces harsh shadows. On bright sunny days, consider using sheer curtains to diffuse incoming light, creating a softer effect. If the sun is too bright, choose interior shots in shaded areas where the lighting is more even.
Balance your exposure settings to prevent overexposed highlights. A well-exposed photograph retains detail in both light and shadow areas, ensuring every feature stands out.
Adjust the white balance settings to capture colors accurately, particularly in kitchens and bathrooms where white cabinetry can reflect light. Clean windows and surfaces reflect light better, enhancing the overall brightness of each shot.
Utilizing natural light not only enhances the aesthetic appeal but also creates a sense of space and warmth in your property images, inviting potential buyers to envision themselves there.
Best Angles for Capturing Each Room’s Layout
For living rooms, position your camera at the corners. This angle showcases the room’s depth and allows the viewer to see multiple walls. Aim for around 4-5 feet off the ground for a natural perspective. Capture wide shots to emphasize the space and arrangement of furniture.
Kitchen Insights
In kitchens, shoot from the doorways. This highlights the flow between spaces and shows off cabinetry and appliances. Take advantage of natural light from windows, and use a wide-angle lens to capture the entire area while paying attention to reflections on shiny surfaces.
Bedrooms and Bathrooms
For bedrooms, stand in the doorway and shoot towards the bed. This angle promotes balance and perspective of the layout. Include any special features like built-in storage. In bathrooms, take pictures from the doorway or corner to capture complete layouts, including fixtures. Keep an eye on lighting, as bright spaces appear more inviting.
Editing Techniques to Make Your Photos Stand Out
Adjust exposure to enhance brightness and contrast. This simple change can brighten shadows and reveal details, especially in darker areas. Use the histogram as a guide to achieve balanced exposure, avoiding overexposure or underexposure.
Enhance colors by adjusting saturation and vibrance. Increase saturation for a bold effect or apply vibrance for a more subtle boost that targets muted tones without affecting already vibrant colors. This technique adds life to your images and draws attention to key features.
Apply selective editing tools to highlight specific areas. Use brushes or gradient filters to lighten certain sections or deepen shadows in others. This can direct the viewer’s gaze toward focal points, such as a beautifully staged living room or a stunning view.
Crop strategically to improve composition. Follow the rule of thirds to create an engaging layout, placing key elements along the intersecting lines. Eliminating distracting items at the edges can also sharpen the focus on the property itself.
Sharpen details smartly to add clarity. Be cautious with the amount of sharpening to avoid an overly edited appearance. Subtle enhancements can bring out textures in walls, furniture, or landscaping, making the property more appealing.
Consider adding a vignette effect to draw the eye inward. This technique subtly darkens the edges of the image, helping to emphasize the center where your property’s features reside. Maintain a light touch to keep it natural.
Finally, apply noise reduction if you’ve shot in low-light conditions. This will smooth out grain and enhance the overall quality of your images, making them look polished and professional. The goal is clarity and professionalism in every photo.
Incorporating Technology: Aerial and 360-Degree Photos
Utilize aerial photography to highlight the property’s unique positioning. Drones provide stunning overhead shots that emphasize the relationship between the house and its surroundings. Showcase gardens, landscaping, and nearby amenities.
- Use high-resolution drones for clearer images.
- Time your shoots for golden hours to enhance lighting.
- Simplify post-processing to ensure quick turnarounds.
Integrate 360-degree photos for immersive experiences. This technique allows prospective buyers to explore rooms virtually, helping them envision living in the space.
- Choose stable tripods and panoramic heads for smoother captures.
- Ensure proper lighting and minimal shadows in each shot.
- Edit photos for seamless transitions between images.
Combine these technologies to create engaging virtual tours. This appealing approach can differentiate your listing and attract more viewers. Highlight key features like spacious layouts, outdoor areas, and neighborhood perks to engage potential buyers effectively.
Creating a Compelling Outdoor Space in Your Shots
Highlight outdoor features by selecting the right time for your shoot. Golden hour, shortly after sunrise or before sunset, provides soft lighting that enhances colors and textures. Aim for this timeframe to showcase your property’s outdoor spaces effectively.
Incorporate inviting elements that attract viewers’ attention. Add outdoor furniture like stylish chairs, tables, or hammocks. These items create a warm atmosphere and encourage potential buyers to envision themselves enjoying the space. Fresh flowers or well-maintained plants also add vibrant colors.
Use composition techniques to frame outdoor areas. Position the camera at various angles to find the most flattering perspective. A low angle can make spaces appear larger, while placing the focus on key elements like trees or pathways directs the viewer’s gaze effectively.
Highlight connectivity between indoors and outdoors. Open doors or windows to create a seamless transition. Capture the view from inside looking out, showcasing both spaces together. This approach helps potential buyers understand the flow of the property.
Consider the season and its impact on your shots. Spring and summer usually provide lush greenery, while autumn offers rich, warm hues. Choose a time that complements the property’s appeal and aligns with your target market.
| Time of Day | Lighting Quality | Best Features to Highlight |
|---|---|---|
| Early Morning | Soft, warm light | Dewy lawns, fresh blooms |
| Midday | Harsh light | Shade areas, pools |
| Late Afternoon | Golden light | Pathways, outdoor seating |
| Sunset | Warm, dramatic light | Silhouettes, fire pits |
Lastly, edit your photos thoughtfully. Adjust brightness and contrast to make colors pop while ensuring natural appearances. Remove distractions that may detract from the property’s appeal. The goal is to create an inviting portrayal that resonates with viewers.
Common Mistakes to Avoid in Real Estate Photography
Avoid clutter in your shots. Remove personal items, excess furniture, and distractions that detract from the space. Aim for a clean and inviting atmosphere. This allows potential buyers to envision themselves in the home.
Lighting Issues
Use natural light as much as possible. Take photos during peak daylight hours to showcase every room brightly. Avoid shooting at night unless you’re highlighting ambiance with well-placed lamps. Artificial lighting can cast unflattering colors; aim for balanced exposure.
Wrong Angles
- Capture each room from the corner to create depth.
- Utilize wide-angle lenses for a better perspective.
- Avoid shooting from eye level all the time; experiment with angles to find the most flattering view of a space.
Stay focused on important features. Highlight unique selling points, such as fireplaces, custom cabinetry, or outdoor spaces. These details can elevate your listings and draw attention.
Ignoring Post-Processing
Enhance your images with editing software. Adjust brightness, contrast, and saturation to make the photos pop. Remove distractions and correct distortions but maintain realism to ensure the property looks genuine and appealing.
Lastly, always remember to incorporate consistency across your portfolio. Maintain a uniform style that reflects your branding and approach. Buyers appreciate a polished look that aligns with professionalism in every photo.
Leveraging Social Media for Maximum Photo Exposure
Share your real estate photos on platforms where potential buyers spend time. Use Instagram for striking visuals and Facebook for community engagement. Tailor your content to each platform’s audience. On Instagram, focus on high-quality images and use relevant hashtags like #RealEstatePhotography and #DreamHome. On Facebook, post engaging captions that tell a story about the property.
Engagement boosts visibility. Respond to comments and messages promptly. Encourage followers to share your posts or tag someone who might be interested. Consider running contests that incentivize users to share your content. For example, ask followers to share a photo of their dream house, tagging your account for a chance to win a gift card.
Collaborate with local influencers or real estate professionals. Their endorsements can introduce your property to a broader audience. Utilize Facebook Live or Instagram Stories to host virtual tours, showcasing features in real-time and interacting with viewers. This approach creates a sense of urgency and excitement.
Analyze your performance. Utilize analytics tools on these platforms to track engagement rates and the best times to post. Use this data to refine your strategy, focusing on what resonates with your audience.
| Social Media Platform | Best Practices | Recommended Content Types |
|---|---|---|
| Use hashtags, post high-quality images, frequent stories | Photos, Reels, Stories | |
| Engage with comments, run contests, share long captions | Posts, Live videos, Stories | |
| Create boards, use keywords in descriptions | Infographics, High-quality images |
Experiment with timing. Post during weekdays or evenings when users are active. Test different types of content to see what drives the most engagement, whether it’s before-and-after transformations or neighborhood features. Adjust and refine your approach based on the feedback you receive.
Consistency builds recognition. Create a content calendar to maintain a steady flow of posts. Share a mix of property photos, informative posts about the buying process, and industry insights to keep your audience informed and engaged.
Video:
How to Photograph a House in 30 Minutes – Real Estate Photography 101
How to Photograph a House in 30 Minutes – Real Estate Photography 101 by Jonathan Corbett 31,925 views 3 months ago 47 minutes
Q&A:
What are the key factors to consider when choosing the right time to photograph a property?
The time of day significantly impacts the quality of real estate photographs. The golden hour, which occurs shortly after sunrise and before sunset, offers soft and flattering natural light. Midday can create harsh shadows, while overcast weather can provide even lighting without bright spots. Adjusting the time according to the property’s orientation and the desired ambiance is crucial for optimal results.
How can I effectively use staging in my real estate photography?
Staging is vital for showcasing a property’s potential. It involves arranging furniture and decor to highlight the best features of each room. Use neutral colors and minimal accessories to create a clean and inviting atmosphere. Additionally, consider the flow of the space; the arrangement should allow viewers to see how the space is utilized. A well-staged home can evoke feelings of warmth, making it easier for potential buyers to envision themselves living there.
What equipment do I need for high-quality real estate photography?
For high-quality photographs, a DSLR or mirrorless camera with a wide-angle lens is recommended, as it can capture more of a room in one shot. A tripod is essential for stability and consistent framing. External flashes or softboxes can help illuminate darker areas. Lastly, a lens with a low f-stop can create depth of field, making the images more appealing. Invest in good editing software to enhance the final images post-shoot.
How should I prepare a property before the photo shoot?
Preparation is key for a successful shoot. Begin by decluttering the space, removing personal items, and cleaning thoroughly. Ensure all lights are working and consider using higher wattage bulbs to brighten the rooms. Open curtains to let in natural light and consider adding fresh flowers or bowls of fruit for a touch of color. Make sure outdoor areas are tidy as well, as curb appeal is important. These steps can significantly improve the visual impact of your photographs.
What editing techniques can enhance my real estate photographs?
Editing can significantly enhance the appeal of real estate photographs. Basic adjustments include correcting exposure, contrast, and color balance. Use cropping to eliminate distractions and focus on key elements of the image. HDR (High Dynamic Range) techniques can help in balancing light across different areas of a photo. Additionally, consider removing any unnecessary elements, such as power lines, to create a cleaner look. Always strive to keep the edits natural-looking to faithfully represent the property.


